
There are three general methods of fitting resilient sheet flooring into a room: freehand knifing, direct or straight scribing and pattern scribing.
Method 1: Freehand Knifing
A. Precutting and Positioning
In freehand knifing, an oversized piece of material is taken into the room and fit while it is in place. This is the oldest type of fitting and is learned mostly by experience. Safety cuts keep the material from tearing.
Precut the pieces accurately. It is much easier to cut the pieces close to size in an area where you can lay them out flat. Generally, allow 1-1/2″ for each end wall.
Move the material into the room. Use special care when handling material wider than 6′. It is easier to unroll rotovinyl flooring if it has first been rolled face in outside the room. Rolling or tubing material can make it easier to get into the room. If tubed, material should be face in.
You can often align the factory edge of the material with a straight wall. This saves fitting one wall and can also align the pattern of the material in the room.
B. Safety Cuts
After the material is in the room, make safety cuts so it will lay flat on the floor. This will make final fitting easier and prevent the material from tearing. There are four basic safety cuts: the curved or irregular-shaped wall, the inside corner, the outside corner and cutting completely around or on three sides of an object such as a toilet bowl or door trim.
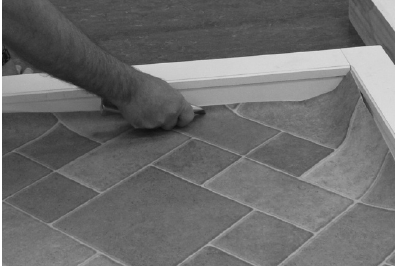
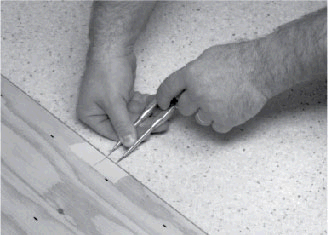
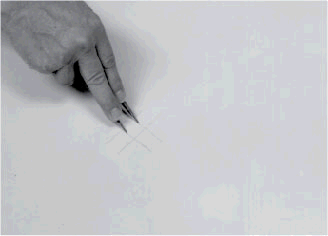
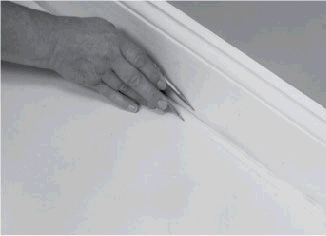
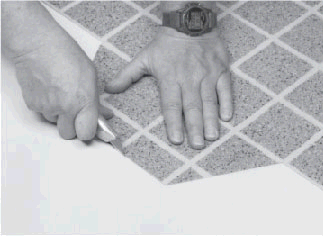
The safety cut for an irregular wall is a vertical cut in the part of the material that flashes up the wall (Fig. 1). These cuts allow the material to be pushed down to the juncture of the wall and the floor and take the shape of the wall. They should not go so deep into the material that they show in the finished job. The excess material can then be trimmed away. Place the side of the knife against the wall to guide the cut and to prevent marking the wall.
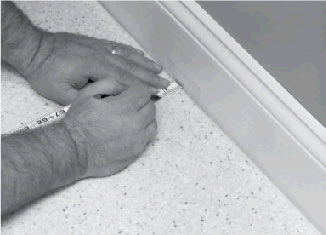
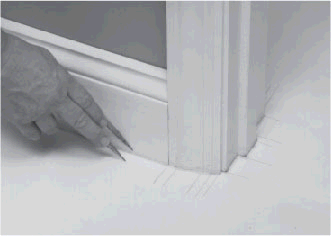
The inside corner safety cut is a diagonal cut across the material (Fig. 2) that allows it to be pushed down into the corner (Fig. 3). Do this in steps, checking the fit after each cut so you do not cut too much from the corner.
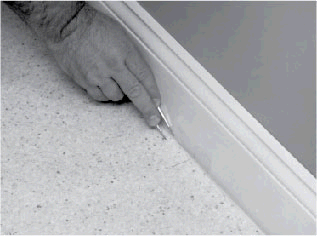
Start the outside corner safety cut by pushing the material down to the juncture of the floor and wall. Cut down along the corner to the floor (Fig. 4). Trim the material flat to the floor at the corner before the ends are pushed down (Fig. 5). Otherwise, a tear may occur at the corner.
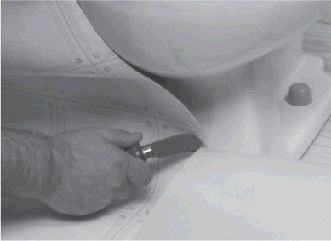
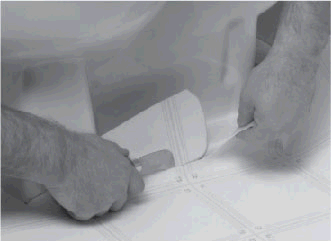
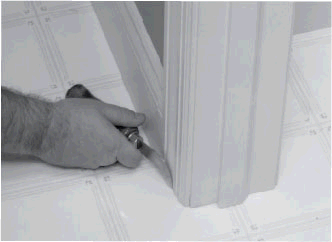
To cut completely around or on three sides of an object, flash the material up the front of the object and push it in against the juncture of the floor and the object. Slit the material almost to the floor (Fig. 6). You can use a small crosscut at the bottom to keep this cut from tearing into the material. Work the material down to the floor, relieving any strain at pressure points by cutting the material flat to the floor at every place where pressure occurs (Fig. 7).
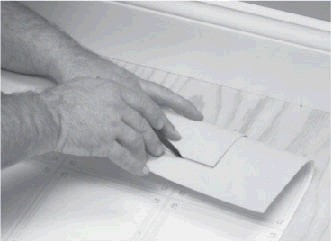
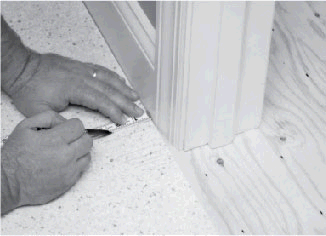
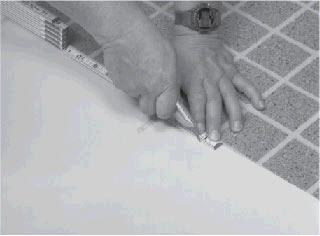
A. Door Trims
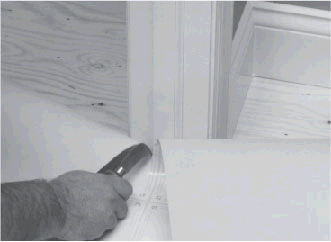
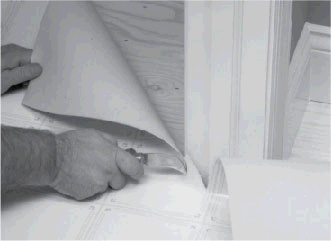
Door Trims can be fit by slitting the material down the center of the door trim (Fig. 7), slitting the material to the floor at the pressure points (Fig. 8) and trimming the material to the door casing (Fig. 9). The side of the blade and not the point should ride against the trim.
D. Finish Fitting
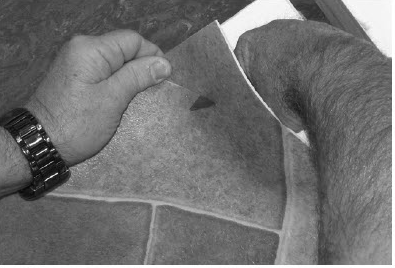
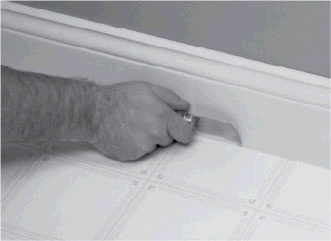
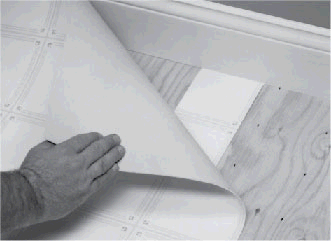
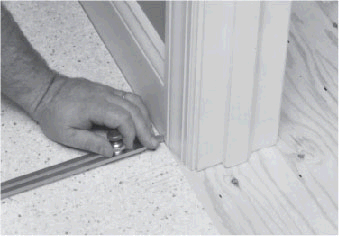
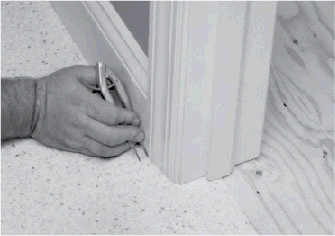
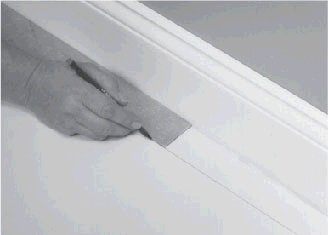
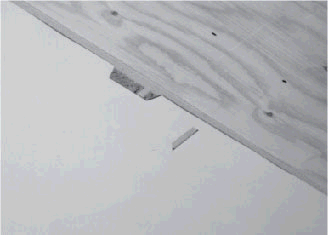
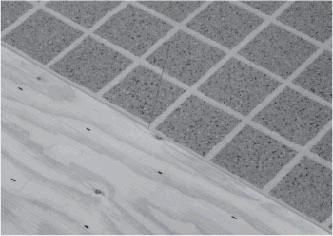
After you have made all the safety cuts, pull back the material and spread the adhesive in one half of the room at a time. The adhesive should be under the material and rolled before the final cuts are made. Press the material down into the place at the juncture of the objects and the floor. Make small cuts, working the material down to the floor. The spring in the knife blade will help you follow the contour of the object you are fitting (Fig. 10). With the side of the knife placed along the wall, use pressure to bend the blade of the knife so that it follows the object you are fitting. Do not try to cut off too much at one time. Do not exert too much pressure on the point of the knife down into the subfloor.
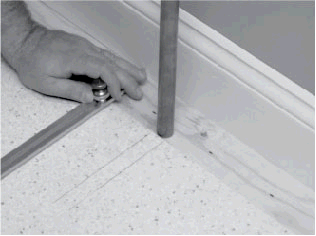
E. Strip Measuring
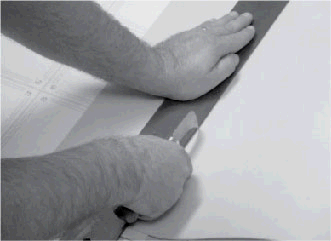
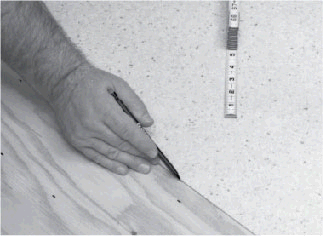
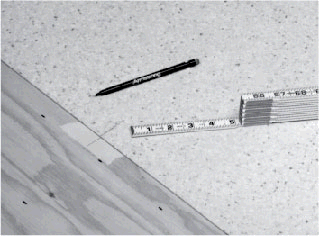
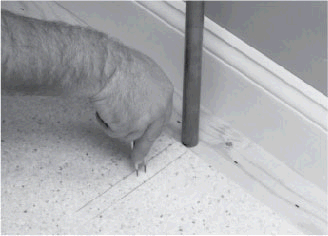
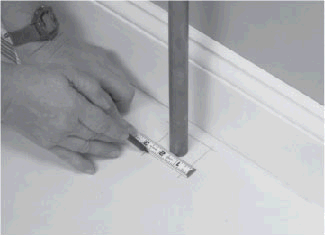
This method of fitting is very effective if the wall is straight or if the trim or molding is being used. Flash the material up the wall to be fit and pull the material back from the wall. Place a piece of scrap material of the same gauge with a squared end against the wall and under the material (Fig. 11). Then pull the scrap piece back against the material to be fit (Fig. 12). Place a mark at the end of the scrap piece. Remove the scrap and fold the piece back to the point where a straightedge can be laid on the marks (Fig. 13). There should be some additional allowance at the straightedge for the curvature of the material when the marks were made. Mark the material and cut. Be careful not to cut through the material into the flooring beneath.
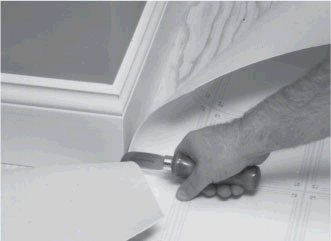
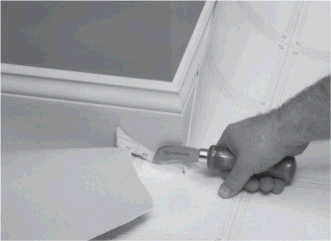
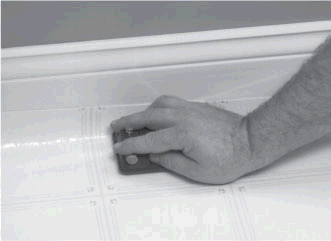
A wall trimmer can be used for finish fitting of straight walls (Fig. 14). The wall trimmer is a quick and accurate way of fitting straight walls with one pass.
F. Pattern Matching When Freehand Knifing
After the first piece of material has been fit, spread the adhesive to within 12″ of the seam. After deciding the position of the seam in the pattern, cut small key marks using a straightedge (Fig. 15).
Along the proper edge of the second piece, cut small key marks at corresponding places in the pattern. Butt the key marks in the second piece to the key marks in the first piece, leaving the balance of the seam overlapped to be double cut later (Fig. 16). With the pattern matched, fit and spread adhesive on the second piece to within 12″ of the seam. Double cut the seam, spread adhesive on the area beneath and roll the seam into place.
Many materials that are fit by the freehand knifing method are also seam coated. Check individual product instructions for information concerning this procedure.
Method 2: Direct or Straight Scribing
This type of fitting is used in areas where more than one piece of material is to be installed. With the material moved close to the wall to be fit, use dividers or scribing bar to move the outline of the wall or object out onto the material. The legs of the dividers or the scribing bar must be held at a right angle to the edge of the material.
A. Three-Wall Scribe
In straight scribing, the usual procedure is to scribe three sides of the sheet, sliding the piece back and forth until it lies flat. This is called a three-wall scribe.
Place the material in the room with both ends flashed up the wall and the length of the piece as close to the wall as possible. Place a pencil line on the wall and the material. Use these lines for proper placement of the cut material (Fig. 17).
Use either dividers or the scribing bar, scribe the outline of the main wall onto the material (Fig. 18). The main wall is the one running the length of the piece of the material and is always scribed first. After scribing, move the material away from the wall and cut with a notched knife. This knife will cut cleaner when it is held at a slight angle. Always cut with the scrap piece on the same side as the hand you use to cut the material. This will slightly overcut the wear layer and produce a better fit at the wall.
After the piece is cut, move it into place against the main wall with the ends flashed up. Line up the pencil lines made in Fig. 18. Draw a line along the factory edge of the material when it is in place against the main wall (Fig. 19). This will keep the factory edge parallel to the wall when it is pulled back to scribe the end wall. Without this line, the material could become turned, causing an inaccurate scribe on the end wall. If you keep the factory edge on this line when it is pulled back from the end walls, the pieces will always be straight in the room. Draw a crossline on the material and on the subfloor at the factory edge (Fig. 20). These two lines should line up when the piece is in place. Now pull the piece of material away from the end wall until it lies flat.
With the factory edge on the line drawn along it, set the dividers to the difference between the two crosslines (Fig. 21). Scribe this amount from the end wall. Reverse the procedure for the other end wall using the same set of lines as those used for the first wall.
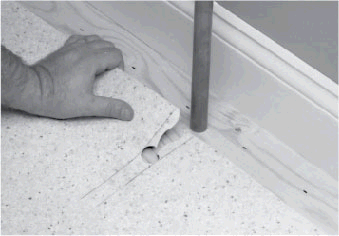
B. Pipes
When scribing a wall and a pipe at the same time, use offset lines for the sides of the pipe (Fig. 22). Extend these lines straight out from the sides of the pipe and squared to the edge of the material. Use the same scribe setting as the one for the wall and mark the front of the pipe between the offset lines. Swing a circle with the dividers, touching both offset lines and the scribe mark (Fig. 23). Cut a seam into the circle, and cut out the scribe line for the wall and a circle for the pipe (Fig. 24).
C. Door Trims
Offset lines are also drawn on the material when scribing door trims (Fig. 25). A rough scribe can be used where the scribe is too long to be accurate (Fig. 26). After the rough scribe with the scribing bar, move the material closer and re-scribe using the dividers for a more accurate fit (Fig. 27).
Method 3. Pattern Scribing
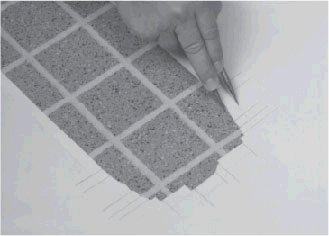
Pattern scribing is a method of fitting material in small or complicated areas. Using scribing felt or some other paper, the outlines of the room and the objects in it are moved a certain distance onto the felt paper. When this pattern is placed over the material to be installed, the lines are moved back the same distance.
A. Knifing in the Felt
Cut the felt paper into the room using a straight-blade knife. It is not necessary to cut the paper very close to all the objects, but it should be within 1/4″. If more than one piece is used, butt the edges together. If the felt is bowed so that a butt seam cannot be achieved, overlap the two pieces and double cut a seam. After all the pieces are cut into place, cut triangular windows and secure with tape. Crosslines should also be scribed across the seams (Fig. 28). This will help in lining up the two scribed across the seams. This will help in lining up the two pieces when they are moved to another area to transfer the scribe lines.
B. Scribing the Pattern
The same tools and settings must be used to transfer the scribe lines onto the material that were used to scribe them onto the felt. To ensure this, put the setting of your dividers on the felt before you scribe (Fig. 29). Check this setting before the pattern is transferred.
After the felt is in place, scribe the pattern with dividers or a straightedge. Using the dividers and keeping the legs at right angles to the point you are scribing, move the outline of the walls onto the felt (Fig. 30). On straight walls, you can also use a straightedge or square (Fig. 31).
When you come to a door trim or some other offset, extend lines for all surfaces running parallel to the legs of the dividers (Fig. 32). These lines will later be extended from the pattern onto the material. Mark pipes by using a rule to move the sides of the pipes out onto the felt (Fig. 33).
When this is done on four sides of the pipe, there will be a square on the felt. When this felt pattern is placed over the material and these lines are moved back the width of the rule (Fig. 34), there will be a square on the material. Using dividers, swing a circle hitting all four sides of the square. The pipe will fit into the circle.

C. Transferring the Pattern
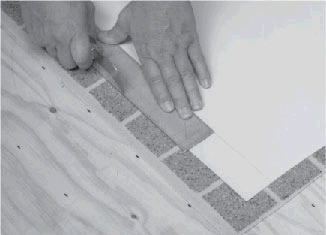
Now that the lines of all objects in the room have been extended onto the felt pattern, lay out the material to be fit in a larger area that is clean, well-lighted and warm: a family room, garage, basement, etc.. It is not a good idea to take the material outside unless it is a covered area which meets the proper temperature requirements. Driveways have stones that can punch holes in the material and sometimes tar or asphalt can discolor it. Place the felt pattern over the material so that it is lying exactly as it was in the room.
The felt pattern must be aligned with the pattern in the material so that the longest wall will be parallel to the pattern in the material.
The crosslines you put across the seam will help you to line up the pieces of the pattern. Fasten the felt pattern to the material with tape at the triangular windows so it will not move. Now extend all of the lines from the felt pattern onto the material the same distance you extended them onto the felt pattern. Fig. 35 shows the lines being transferred with the dividers and Fig. 36 shows the lines that were put on with the square being transferred.
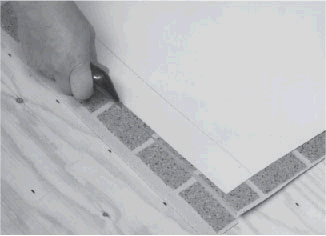
D. Cutting the Pattern
After you have moved all of the lines from the felt pattern to the material, you are ready to cut the material on your scribe or pencil lines. We recommend a notched-blade knife. It cuts through the material in one cut and does not cut the floor beneath (Fig. 37). Keep this in mind when you are selecting an area in the house for your pattern scribing. A good floor could be ruined if you cut into the floor beneath your material.
E. Pattern Matching When Pattern Scribing
If the first piece of material is fit and adhered into place and the second piece must be pattern scribed, straightedge the first piece at the seam edge at the proper place in the pattern of the material. If the material has a grout line along the edge, reduce it to a width slightly smaller than those grout lines in the field of the material. This will allow the material to be seamed along the edge of the grout line. Next, cut the felt, butting it to the straight edge of the first piece of material, and scribe the room as usual. Then mark the pattern of the installed piece on the felt so you can place the felt over the second piece of material on corresponding pattern lines. There are several ways of doing this:
Option 1: Extend pattern lines from the first piece of material on the felt (Fig. 38). These lines can be used to place the felt over the same lines on the second piece of material and allow you to line up the pattern along the length of the material. Make an allowance to get the proper overlap of the second piece over the first piece when installed. This is necessary to allow some selvage to cut the seam and also to cut away enough material on the second piece to provide a proper match. Cut small key marks in the felt along the straightedged piece using a folding rule or bar if the felt does not butt very well to the edge of the material (Fig. 39). Use these key marks to locate the area where the seam is to be cut. You can use the edge of the felt for this purpose if it butts well to the straight edge of the first piece of material. When the felt is assembled over the material, use the lines and key marks to align the match and the overlap (Fig. 40).

Option 2: Use a scrap piece of material to mark the match on the felt. Cut a scrap piece from the selvage that was left when the first piece of material was fit to the wall. It should correspond to the edge of the second piece of material that will be at the seam. Place this piece of material over the felt so that it matches the first piece of material that has been installed (Fig. 41). Cut the outline of this piece of material into the felt (Fig. 42). Mark several areas along the seam. When the felt has been scribed, place the scrap template over the second piece of material so it is over the exact match (Fig. 43). Bring the felt pattern in against the scrap template until the cutout area fits around the template (Fig. 44). This should line up the end-to-end match and the overlap.
F. Pattern Matching by Scribing Two Pieces at One Time
The easiest way to pattern match while pattern scribing is to lay out more than one piece at a time. The limiting factor is having enough room to lay out both pieces of material. Straightedge one piece of material for the seam and overlap the second piece to line up the pattern match. Then tape the two pieces securely together.
You can now pattern scribe the complete room and then place the felt pattern over the two pieces of material. Be sure the felt pattern is squared with the pattern of the material. Transfer the felt pattern to the material and cut it out. When the material is placed in the room, the seam area will match. You will be ready to cut the seam after you spread the adhesive.