
Commercial Tile Installation Instructions
For Use With
| Type | Collection & Design | Full Spread S-515 | S-1000* | S-319* | Flip Spray Adhesive |
| VCT | Raffia® Stream™, Crown Texture™, Stonetex®, Feature® Strip& Tile, Imperial Texture®, Safety Zone™ | X | X | X | X |
| No-Wax Dry Back | N/A | X | N/A | N/A | X |
Adhesive Summary
| Adhesives | % Internal Relative Humidity (RH) | MVER: lbs. per 1000ft2 / 24 hours | pH | Open Time | Working Time | Traffic Post-Installation |
| S-515* Adhesive For Use With VCT | 95 | 7 | 11 | Open Time: >30 minutes Dry-to-Touch only Trowel: U Notch 1/32″ (0.8 mm) deep, 1/16″ (1.6 mm) wide, 5/64″ (2.0 mm) apart | 24 Hours | Light Foot Traffic: 24 Hours Heavy Traffic & Rolling Loads: 72 Hours |
| S-1000 Adhesive For Use With VCT | 100 | 14 | 14 | Set-In-Wet Open Time: Approximately 10 minutes Trowel: U Notch 1/32″ (0.8 mm) deep, 1/16″ (1.6 mm) wide, 1/32″ (0.8 mm) apart | 45 Minutes | Light Foot Traffic: 4 Hours Heavy Traffic & Rolling Loads: 8 Hours |
| S-319 Adhesive For Use with VCT | 99 | N/A | 12 | Open Time: 15 minutes Applicator: 3/8” nap Roller | 4 Hours | Immediate |
| Flip® Spray Adhesive For Use With VCT | 95 | N/A | 11 | Dry-to-touch: Approximately 30-40 minutes (no transfer of adhesive to finger)Refer to the provided spray patterns for proper application | 4 Hours | Immediate |
Precaution
| WARNING: EXISTING IN-PLACE RESILIENT FLOOR COVERING AND ASPHALTIC ADHESIVES. DO NOT SAND, DRY SWEEP, DRY SCRAPE, DRILL, SAW, BEADBLAST, OR MECHANICALLY CHIP OR PULVERIZE EXISTING RESILIENT FLOORING, BACKING, LINING FELT, ASPHALTIC “CUTBACK” ADHESIVE, OR OTHER ADHESIVE. These existing in-place products may contain asbestos fibers and/or crystalline silica. Avoid creating dust. Inhalation of such dust is a cancer and respiratory tract hazard. Smoking by individuals exposed to asbestos fibers greatly increases the risk of serious bodily harm. Unless positively certain that the existing in-place product is a non-asbestos-containing material, you must presume it contains asbestos. Regulations may require that the material be tested to determine asbestos content and may govern removal and disposal of material. See current edition of the Resilient Floor Covering Institute (RFCI) publication Recommended Work Practices for Removal of Resilient Floor Coverings for instructions on removing all resilient floor covering structures or contact your retailer or AHF Products at 866 243 2726. AHF floor coverings and adhesives do NOT contain asbestos. |
Keys To A Successful Installation
 VCT is packaged face down except for the last tile in the carton. Before opening, flip the carton of tiles upside down. After removing the first tile, the rest will be face up. Safety Zone Tile is packaged all face down.
 - When using tile from two or more cartons, check to be sure all pattern and lot numbers are the same to ensure proper color match. On larger installations, open several cartons and mix them as they are installed to help blend any slight shade differences from one carton to the next.
- Stonetex only: For best overall visual, install Stonetex with directional arrows pointing in the same direction.
- Heat tiles from the back; do not heat from the front of the tile.
- Do not perform a heavy wet wash on the tile for at least 5 days after installation. This will allow the tile to become well seated in the adhesive and prevent excess moisture and cleaning agents from interfering with the adhesive
- Products installed using the Tile-On System may have less resistance to indentation. Select proper non-staining furniture rests and casters; the contact area should be smooth, flat, and firmly on the floor.
- S-1000 Adhesive is recommended for Safety Zone Tile in areas that may be exposed to frequent surface moisture and/or cooler temperatures. S-1000 Adhesive may also be used to install the first 3 to 5 rows of Safety Zone Tile when used in areas that will be affected by surface moisture and/or cooler temperatures.
Recommended Substrates
All substrates listed below must be properly prepared and meet the requirements discussed in the Subfloors and Underlayments category on this website. There may be other exceptions and special conditions for these substrates to be suitable for the Installation System.
Substrates:
- Concrete on (all grade levels) according to ASTM F710 and Preparation of Concrete Subfloors
- Suspended Wood and Wood Underlayments
- Ceramic tile, terrazzo, marble and polymeric-poured floors
- Properly mixed and applied powder underlayments and embossing levelers
- Primed, poured-in-placed gypsum subfloors
- Steel, Stainless Steel, Aluminum (To install over steel, stainless steel, or aluminum, use S-319 Roll Strong Adhesive)
- Radiant-heated subfloors where the surface temperature does not exceed 85oF (29o C)
Tile-On:
- Existing Resilient Sheet Floors
- Vinyl Composition, Vinyl Asbestos, Asphalt and Vinyl Tile-On Grade or Suspended Only.
- Bond tests should also be conducted for compatibility with the substrate. It is recommended that this test be used to determine the compatibility of resilient flooring adhesives to concrete subfloors after the removal of old adhesives, curing agents, parting compounds, dust inhibitors, oil, grease, paint, varnish and other special surface treatments or conditions. Using the flooring material and recommended adhesives, install 3′ x 3′ panels spaced approximately 50′ apart throughout the subfloor area. Select areas next to walls, columns, or other light traffic areas. Tape edges of panels to prevent edge drying of adhesive. When testing where a curing agent has been used, the curing agent must be removed in some areas for bond testing. If the panels are securely bonded after a period of 72 hours, you may conclude that the subfloor surface is sufficiently clean of foreign material for satisfactory installation.
- As an alternative to the removal of residual asphalt cutback adhesives or when installing over metal, you can apply a minimum 1/8″ layer of cementitious underlayment, such as S-194 Patch, Underlayment and Embossing Leveler or S-466 Patch Strong™, as approved by the underlayment manufacturer. All warranties and/or performance guarantees concerning third-party underlayment failure rest with the underlayment manufacturer and not with Armstrong Flooring.
- Many adhesive removal products contain solvents that leave a residue within the subfloor. This residue can negatively affect the new adhesive and bleed through the new floor covering. The use of asbestos encapsulants or bridging materials over asphaltic adhesive is not recommended. These products may affect the bonding properties of the new adhesive.
- Radiant-heated substrates must not exceed a maximum surface temperature of 85° F (29° C).
- Concrete floors should be tested for alkalinity. The allowable readings are determined by the adhesive being used for installation.
Job Conditions
- Resilient flooring should only be installed in temperature-controlled environments. It is necessary to maintain a constant temperature before, during and after the installation. Therefore, the permanent or temporary HVAC system must be in operation before the installation of resilient flooring. Portable heaters are not recommended, as they may not heat the room and subfloor sufficiently. Kerosene heaters should never be used.
- The surface shall be free of dust, solvents, varnish, paint, wax, oil, grease, sealers, curing compounds, residual adhesive , adhesive removers and other foreign materials that might affect the adhesion of resilient flooring to the substrate or cause a discoloration of the flooring from below. Spray paints, permanent markers and other indelible ink markers must not be used to write on the back of the flooring material or used to mark the substrate as they could bleed through, telegraphing up to the surface and permanently staining the flooring material. If these contaminants are present on the substrate, they must be mechanically removed prior to the installation of the flooring material.
- In renovation or remodel work, remove any existing adhesive residue1 so that 100% of the overall area of the original substrate is exposed.
- Allow all flooring materials and adhesives to condition to the room temperature for a minimum of 48 hours before starting the installation.
- The area to receive the resilient flooring should be maintained at a minimum of 65° F (18° C) and a maximum of 100° F (38° C) for 48 hours before, during and for 48 hours after completion.
- During the service life of the floor, the temperature should never rise above 100° F (38° C) nor fall below 55° F (13° C). The performance of the flooring material and adhesives can be adversely affected outside this temperature range.
- Conduct calcium chloride tests or percent relative humidity tests.
- Testing for internal relative humidity of concrete slabs must be conducted in strict accordance with the current edition of ASTM F2170 Standard Test Method for Determining Relative Humidity in Concrete Floor Slabs Using in situ Probes. All tests must meet allowable moisture limits. Any area that exceeds the allowable moisture limit must be further dried to an acceptable level or treated with a moisture remediation system before flooring installation. Performance of any third-party moisture remediation system rests with the manufacturer of that system, not with Armstrong Flooring. As a reminder, these tests cannot predict long-term moisture conditions of concrete slabs. They are only indicators of moisture conditions at the time the tests are conducted.
- MVER tests must be conducted in accordance with the current edition of ASTM F1869 Standard Test Method for Measuring Vapor Emission Rate of Concrete Subfloor Using Anhydrous Calcium Chloride. When performing these tests, it is important to remove any curing agents or residues down to the bare concrete. The calcium chloride tests are to be performed only on ordinary concrete floors and are not applicable on lightweight concrete, smoothing or leveling compounds, or gypsum underlayments.
[1] Some previously manufactured asphaltic “cutback” adhesives contained asbestos (see warning statement on the last page). For removal instructions, refer to the Resilient Floor Covering Institute’s publication Recommended Work Practices for Removal of Resilient Floor Coverings.
Fitting
See Layout and Fitting for room layout.
- Before installing the material, plan the layout so tile joints fall at least 6 in. (152 mm) away from subfloor/underlayment joints. Do not install over expansion joints.
- When installing over an existing resilient floor, plan the layout so the new joints are a minimum of 6 in. (152 mm) away from the original seams.
- When installing over tile floors, joints should fall in the center of the tile. Avoid having border pieces less than 6 in. (152 mm) wide.
PROCEDURE | S-515 Adhesive
- When using tile from two or more cartons, check to be sure all pattern and lot numbers are the same to ensure proper color match. On larger installations, open several cartons and mix them as they are installed to help blend any slight shade differences from one carton to the next.
- Line off entire area to be installed. Apply the adhesive over the area, being careful not to cover the chalk lines and using the recommended trowel. You may prefer to spread and install one quarter of the room at a time.
- Allow the adhesive to set until dry-to-touch following the recommended open time. To test, press your thumb lightly on the surface of the adhesive in several places. If the surface feels slightly tacky as your thumb is drawn away and does not stick to your thumb, the adhesive is ready for the installation.
- Install the tile along the chalk lines, laying the field area first and then fitting in the border tile.
- Clean adhesive from the surface of the tile.
- Tile should not be exposed to rolling load traffic for at least 72 hours after installation to allow setting and drying of the adhesive.
NOTE: When installing tile be sure that all tile is firmly seated into the adhesive. Rolling with a 100-lb. roller will achieve the same result and is highly recommended.
PROCEDURE | S-1000 Flooring Adhesive for Safety Zone™ Tile and VCT
- S-1000 Adhesive is recommended for Safety Zone Tile (for full coverage or first 3 to 5 rows) in areas that may be exposed to frequent surface moisture and/or cooler temperatures.
- S-1000 Adhesive may also be used to install VCT in areas where concrete moisture exceeds 99% RH or is unknown (no testing required).
- S-1000 requires a porous substrate per ASTM F3191. All patching or leveling materials should be portland cement-based and suitable for high moisture applications, such as S-466 PatchStrong.
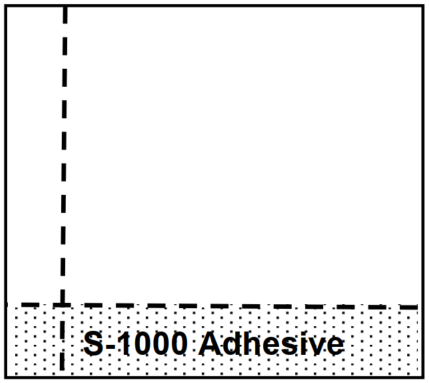
- Apply the Adhesive in no larger than 2′ or 3′ bands (Figure 1), to 1/2 of the area at a time so you can start the installation along the center starting line. Do not apply more adhesive than you can cover within 45 minutes. Allowing a 10-minute open time and fitting the border tile tightly will reduce tile shifting and adhesive oozing. DO NOT allow the adhesive to skin over or dry. If the adhesive skins over or dries, remove it and reapply.
- Do not work on newly installed tile except to roll tile. If unavoidable, use a kneeling board.
- Begin laying tiles along the center starting line and install row by row including the cut pieces at the perimeter until 1/2 of the installation is complete. Periodically lift tiles to ensure 100% adhesive transfer, reducing open time if adhesive transfer is insufficient. Use a hand roller such as a Crain 333 or similar tool to initially embed the tile into the wet adhesive. This will allow you to regulate downward pressure, limiting adhesive bleed-up at the joints. Apply adhesive to the remaining portion of the room and complete the installation of tiles.
- Immediately remove any adhesive from the surface of the flooring using a clean, white cloth dampened with a neutral detergent and water.
- After 1 hour but before 2 hours after the tiles are installed, roll the installed tiles in both directions with a 100-lb. roller. Use a hand roller in confined areas where the large floor roller will not reach, such as under toe kicks.
- Tiles may be exposed to light foot traffic four hours post-installation. The floor can be exposed to heavy rolling traffic in 8 hours post-installation. Use pieces of hardboard or underlayment panels to protect the floor when moving heavy furniture and appliances back into the room.
PROCEDURE | S-319 Roll Strong™
- A clean substrate is extremely important with the use of S-319 Roll Strong Adhesive. Thoroughly sweep and vacuum the substrate first. Damp mop to remove any remaining dust or debris. Extra attention to substrate preparation is essential for a successful installation. Failure to properly clean the substrate may result in telegraphing of debris.
- A roll-on application method is recommended with a medium nap (3/8″ nap) roller to achieve a smooth even full-spread coating. Spread rate and drying time of the adhesive will depend on the porosity and texture of the substrates and the ambient temperature and relative humidity. KEEP PAINT ROLLER WET! Do not apply pressure to the roller, allow it to freely roll over the substrate. ADHESIVE COVERAGE MUST NOT EXCEED 400 ft2/gal! Once the coating has dried, it must be kept clean and apart from any contact with other surfaces until ready to begin the bonding process. Do not spread more adhesive than can be covered in 4 hours.
- Bond testing prior to the installation will help identify the appropriate application rate, open and working time, and any potential bonding problems to the substrate or flooring. To determine the accurate coverage rate, measure, and chalk line the substrate into grids (using the appropriate square feet of area for the adhesive application) and apply adhesive onto each measured grid area.
- Allow the adhesive to dry completely with no transfer to fingers when lightly touched. Open time will vary depending on the adhesive coverage, substrate porosity and the ambient conditions.
- Once the S-319 Roll Strong adhesive has dried, install tile as per recommended. Tile can be repositioned as necessary prior to applying pressure. After completion of the installation, roll the entire floor in both directions with 100 lb. roller to achieve a full contact bond.
NOTE: After the flooring has been rolled or pressed into place, repositioning is not possible. Normal traffic and rolling loads may be allowed as soon as the installation, finishing and clean-up are complete.
SAFETY AND CLEAN UP: Wet adhesive should be cleaned up immediately with soap and water on a clean cloth. Remove any dried adhesive residue with a clean, white cloth dampened with denatured alcohol.
COVERAGE: Rate of application depends on porosity of the substrate. Approximately 300 – 400 square feet per gallon when applied with a 3/8” Nap roller.
PROCEDURE | FLIP® Adhesive
- Condition area to be installed, adhesive, and tile at 65° F (18° C) or above for 48 hours before
- Shake bottle well. Point the bottle downward and press the side of the nozzle tip.
- Walk back and forth at a steady pace. Do not use a sweeping motion.
- Use a shield to protect walls from overspray. A shield can be as simple as a piece of cardboard.
- Spray the perimeter first, then fill in the rest of the room.
- Allow adhesive to set open until dry to the touch, approximately 30 minutes. When dry to the touch, the adhesive will be tacky with no transfer to fingers.
- Wet adhesive, overspray or drips should be cleaned and smoothed immediately using a cloth moistened with soap and water. Drips can be smoothed out with spatula or flat trowel. Between uses, clean the spray tip with a clean wet cloth to prevent accumulation of dried adhesive.
- Install and fit all material within 4 hours. Working time will vary based on job conditions, substrate, temperature, and humidity.
- Roll the floor once immediately after installation with 100-lb roller.
- Remove wet adhesive residue using a clean, white cloth dampened with soapy water. Use denatured alcohol for dried adhesive residue carefully following warnings on container.
- Do not wet wash or scrub flooring for at least five days after installation.
Abutting Different Gauges of Resilient Flooring
When installing thinner gauge material next to thicker gauge materials, install thicker material first and then butt a 12” (30.5 cm) wide piece of scribing felt against the thicker material. Adhere the scribing felt to the subfloor with suitable adhesive. Use S-194 Patch, Underlayment and Embossing Leveler or S-466 Patch Strong™ to feather the edge of the scribing felt to the level of the substrate. Allow the patch to dry completely before installing the flooring. Scribing felt is not recommended to be used under the entire installation.
Clean up
- Clean up wet adhesive with white cloth with neutral detergent and water.
- Clean up dried adhesive with white cloth and denatured alcohol or low odor mineral spirits.
Protect the Floor
Traffic, dirt and discoloration
- In new construction, you may provide a protective covering of plain, undyed kraft paper in high traffic areas to guard against damage to the new floor. Be sure the covering does not contain any inks, markings or other agents that could stain the new floor. Or at least two coats of a high-quality commercial floor polish, like S-480 Commercial Floor Polish, can be applied to temporarily protect the floor until regular maintenance procedures can begin. See Maintenance Instructions for Vinyl Composition Tile.
- Armstrong does not recommend the use of mats or rugs with rubber or latex backings since they may cause permanent discoloration. Protect all products from the direct flow of heat from hot-air registers, radiators or other heating fixtures or appliances.
Temperature Requirements
- Just as proper conditioning of the installation site and flooring products is important before and during installation, it is equally important to maintain room temperature at a minimum of 65°F (18°C) for 48 hours after completion of the installation. Maintain a minimum of 55°F (13 °C) thereafter. Proper room and material conditioning not only affects flooring products and adhesives during the actual installation but also assures proper curing, setting and bonding of these products. Sudden temperature changes and temperature extremes can adversely affect the installation and performance. The surface of radiant-heated floors should not exceed 85°F (29°C).
Moving Heavy Appliances and Equipment
- When moving heavy or sharp objects over resilient flooring installations, place a wood panel under the object. Without moving the panel, slide or roll the object over it. Follow with additional panels as needed. This prevents scratches, tears or buckling of the flooring material.
- Before moving wheeled or castered objects over newly adhered flooring, use wood panels to protect the floor by distributing the load. Otherwise, permanent wheel tracking could develop in the flooring, caused by movement in the fresh adhesive. We recommend protecting the resilient flooring with wood panels whenever heavy objects are moved across it.
Repairs
For tile replacement procedures, see Vinyl Composition Tile (VCT) Replacement Procedure